Reviewing Designs
Introduction
When working with Kanvas’ Designer Mode, collaboration is key. Design reviews allow team members to examine, provide feedback, and approve design proposals, ensuring that all components are thoroughly evaluated and potential issues are identified early. This process leads to more robust designs, informed decision-making, and a unified understanding among team members, ultimately contributing to the success of the project.
Lifecycle of Design Reviews
Submitting Designs
This initial step involves preparing your design to be reviewed by your peers. Start by submitting your design for review, ensuring all components are accurately placed and configured. It is crucial to double-check that every aspect of the design is ready for feedback. In the context of Kanvas, you can submit designs for review by:
- Ensuring Collaboration is Enabled: Make sure that collaboration mode is turned on within Kanvas so that your team members can access and review the design.
- Having the Design in the Same Workspace/Team: Place your design in a workspace or team where other members have access. This ensures that all relevant team members can easily find and review the design. Kanvas allows you to manage design access permissions and visibility, ensuring that only the intended collaborators can view and edit the design.
- Sharing the Design Link: Generate and share a link to your design with your team members. This direct approach ensures that anyone with the link can access the design immediately. Ensure that the designs’s visibility status is set appropriately (Private, Public, or Published) based on who you want to have access.
- Private: Only you, the creator, and the user or team with granted access permission can view and edit the design.
- Public: Anyone within your organization can view, comment on, and edit the design. You can still restrict permissions for individual users or teams.
- Published: The design becomes discoverable to other Meshery users, allowing them to view, download, and clone the design.
By following these steps, you can effectively submit your designs for review within Kanvas, ensuring that they are accessible to the right team members and ready for collaborative feedback.
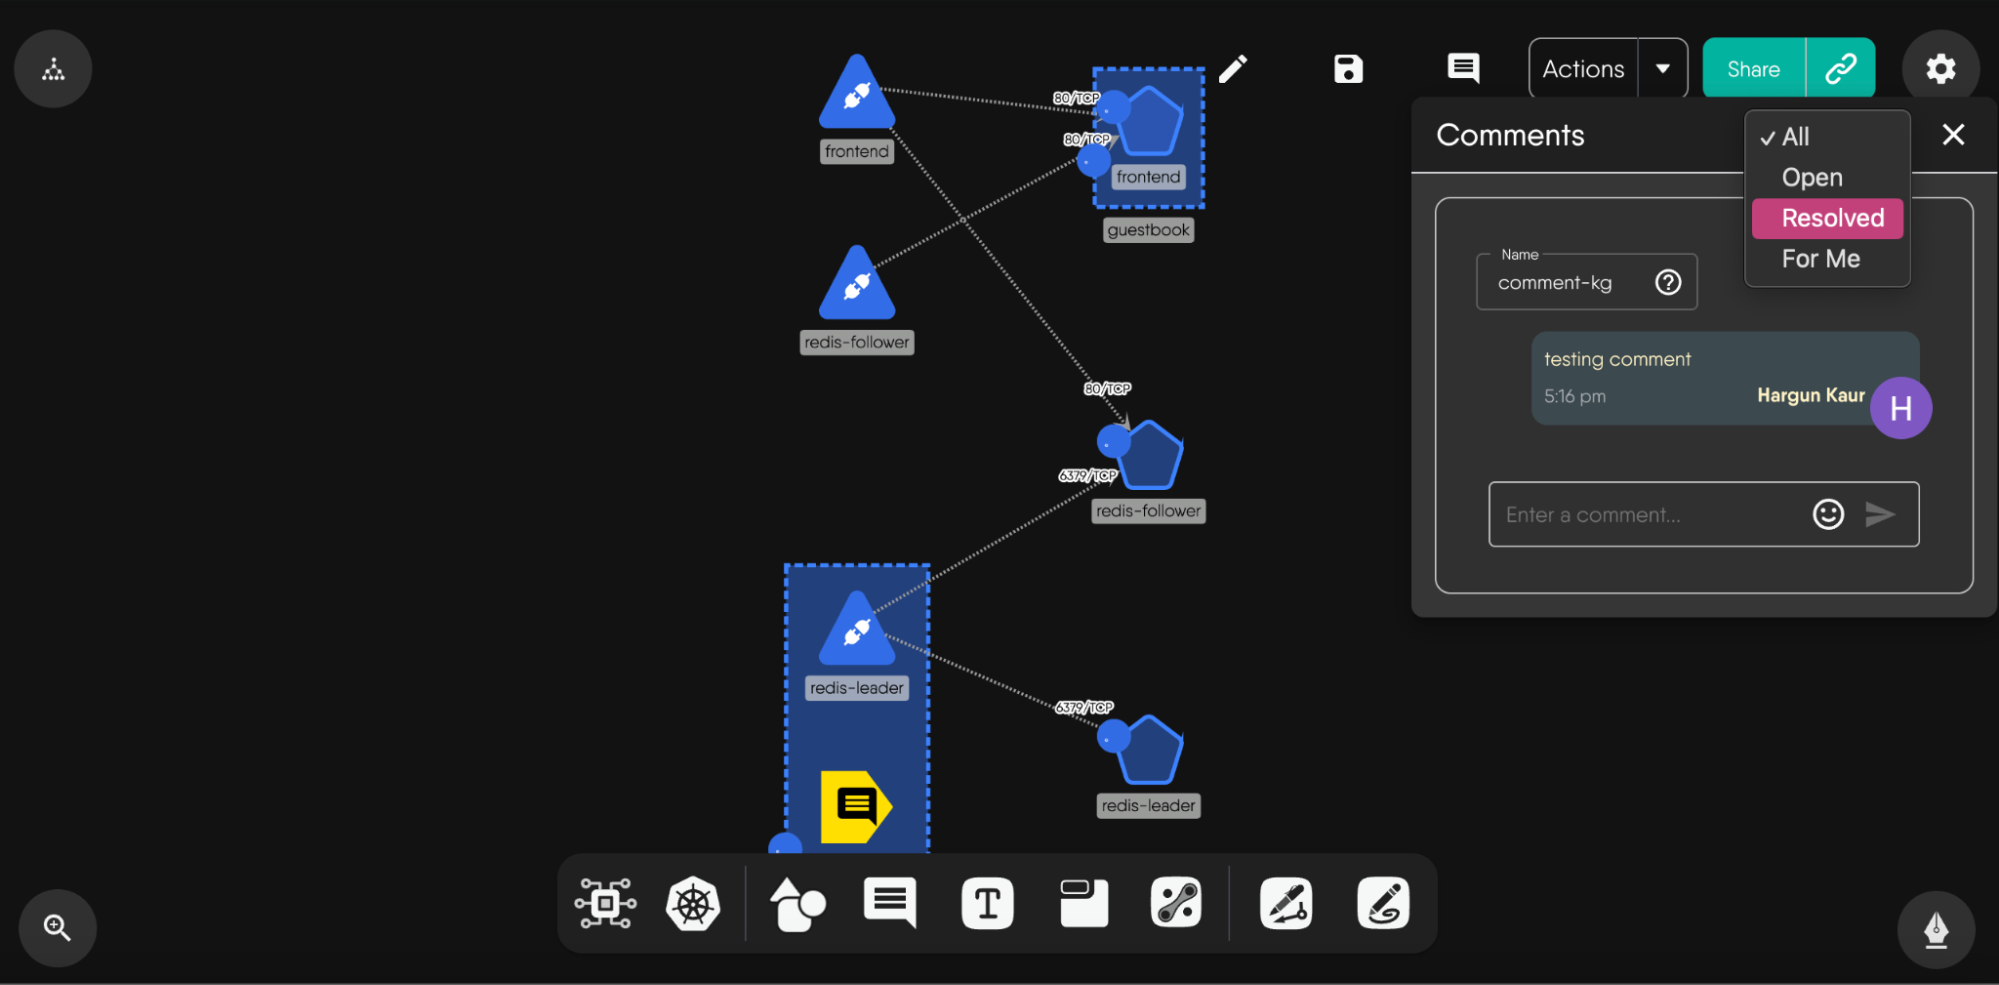
Reviewing Designs
Team members can review designs using comments or annotations.
Design Reviews with Comments
You can add comments in two convenient ways:
- Commenting via the Dock: Click on the comment icon in the dock to create a new comment, or drag and drop it anywhere on the canvas to position it.
- Commenting via Context Menu in Canvas:" Right-click anywhere on your canvas and select “Add Comment Here” from the context menu or use the shortcut Ctrl + M (Command + M for Mac users). This allows for swift comment placement exactly where you need it.

Tips for using Comments as a Design Review Tool
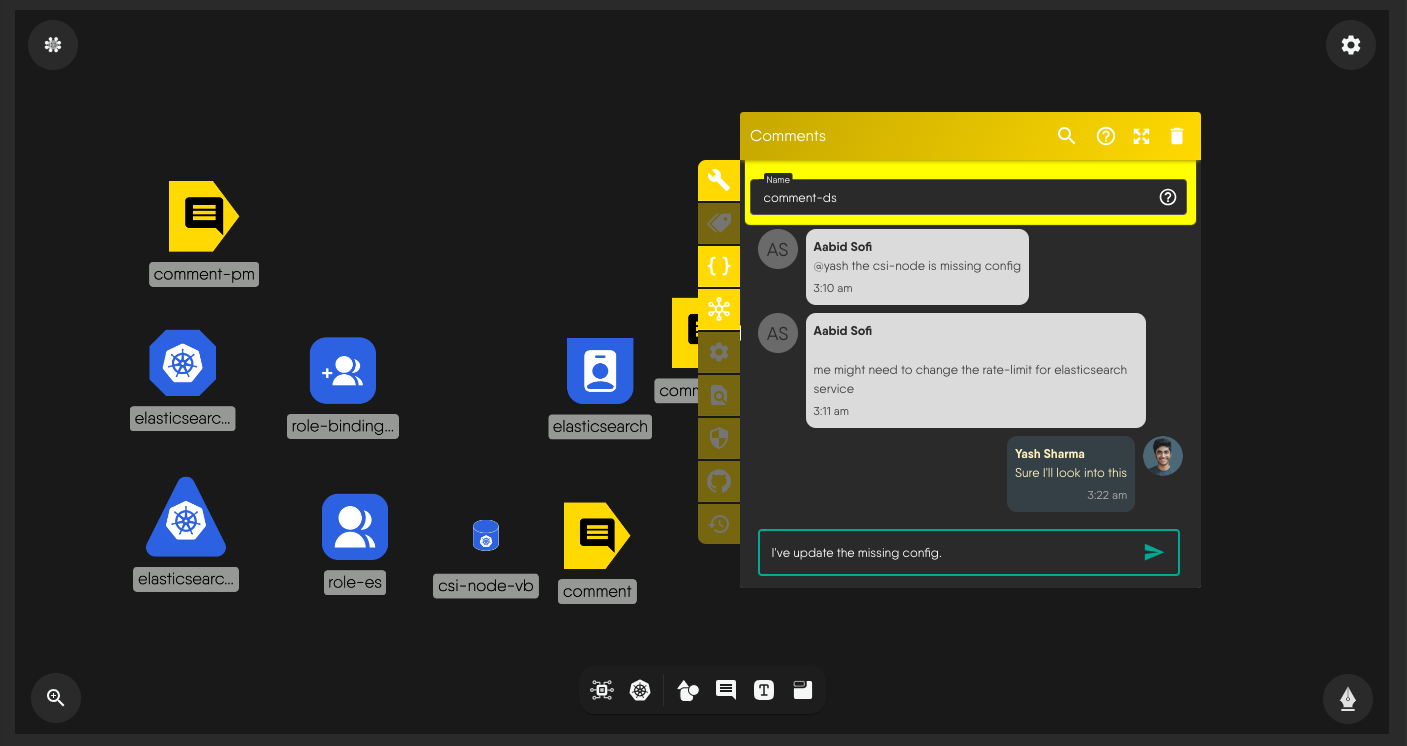
- Initiating Threads: You can initiate a comment thread by adding a comment. Your comment may request a design review or provide feedback on a design. Team members can reply directly to comments, creating a structured dialogue around each point of feedback for easy referencing.
- Utilize Mentions: Easily draw the attention of relevant team members by tagging them in your comment. To activate this, type @ in the comment box, and a list of your team members will appear. Select who you want to mention. This ensures that the right people are notified and can contribute to the discussion.
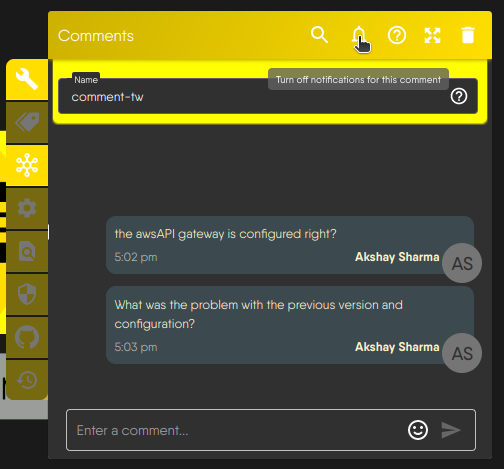
- Enable Email Notifications: Customize your notification preferences to receive emails for comments on your design. When this is enabled, you’ll be notified when comments are made on your design, you’re mentioned in a comment, or someone adds a comment to a thread you’ve previously engaged with.
- Mute Comment Notifications: You can also customize your notification preferences to mute email notifications for comments on your design. This can be useful if you want to temporarily pause notifications or reduce email clutter. You’ll still have access to all comments directly within Kanvas.
- Comment on Specific Elements: Place comments to specific components, whether it’s a shape, text, or an entire component. This specificity ensures that feedback is targeted and directly related to the part of the design under discussion.
Resolving Comments
Once the feedback has been addressed, you can mark the comment as resolved. For resolving comments, simply right click on the comment component and select the “resolve” comment action. It closes the comment thread and signifies that the conversation around that feedback has concluded. It helps keep the review process organized and ensures that completed discussions are neatly archived.
View Comment History
Even after comments are resolved, you can view the history to understand the decisions and discussions that took place. This feature is beneficial for future reference and maintaining a clear record of the review process.
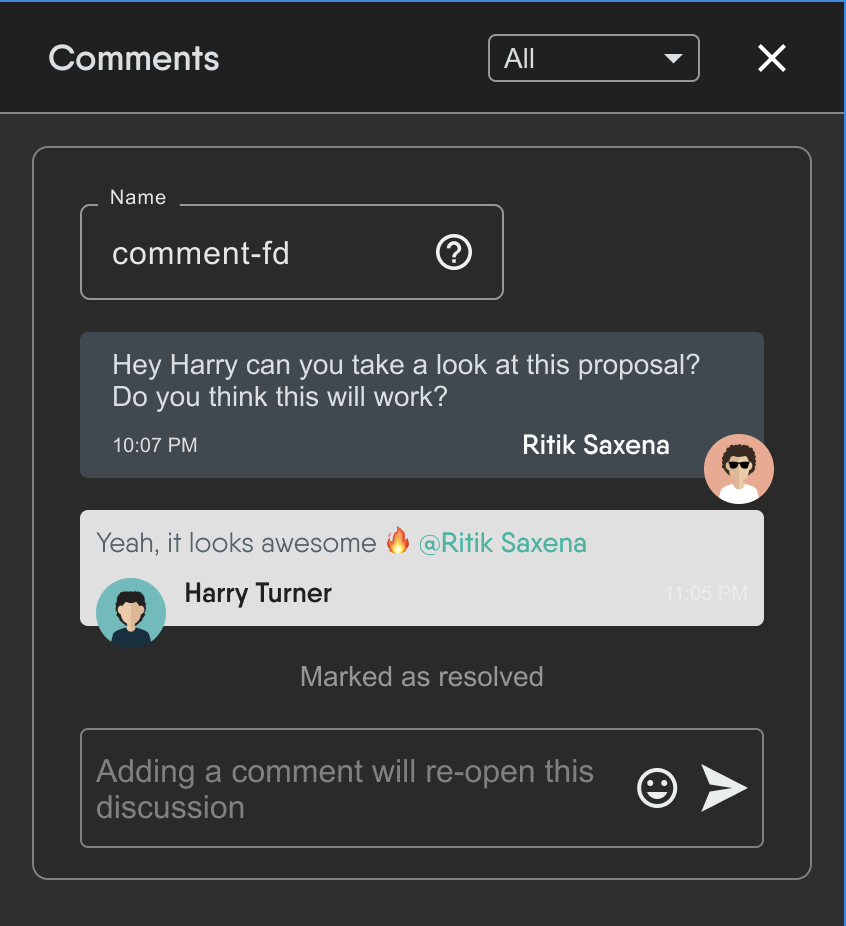
Reopening Comments
After a comment has been resolved, there might be situations where you need to reopen the discussion. Unresolving a comment allows you to reinitiate conversations, address additional concerns, or make further changes.
To unresolve a comment:
- Click on the comment icon at the top right of the design canvas.
- Select "resolved" from the dropdown menu.
This will show the resolved conversations which can be reopened. This flexibility ensures that ongoing iterations and continuous improvements can be managed effectively.
By following these steps, you can create a thorough and collaborative review process within Kanvas, ensuring that your designs are vetted comprehensively and efficiently.
Pinning and Locking Comments in Kanvas
Pinning of Comments
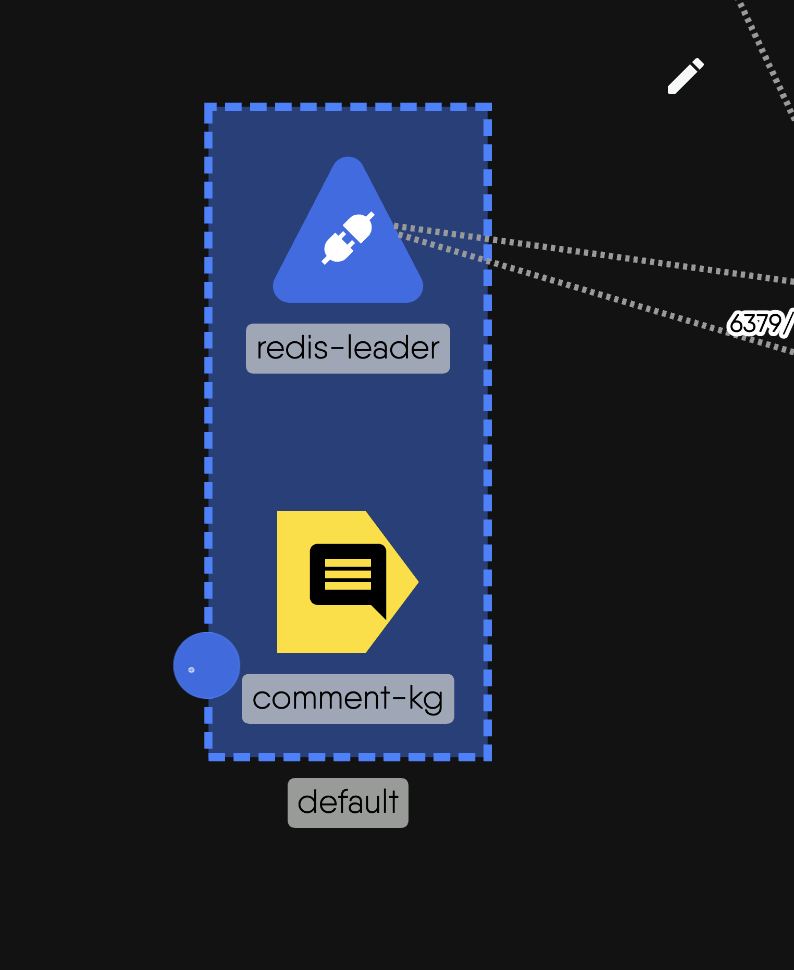
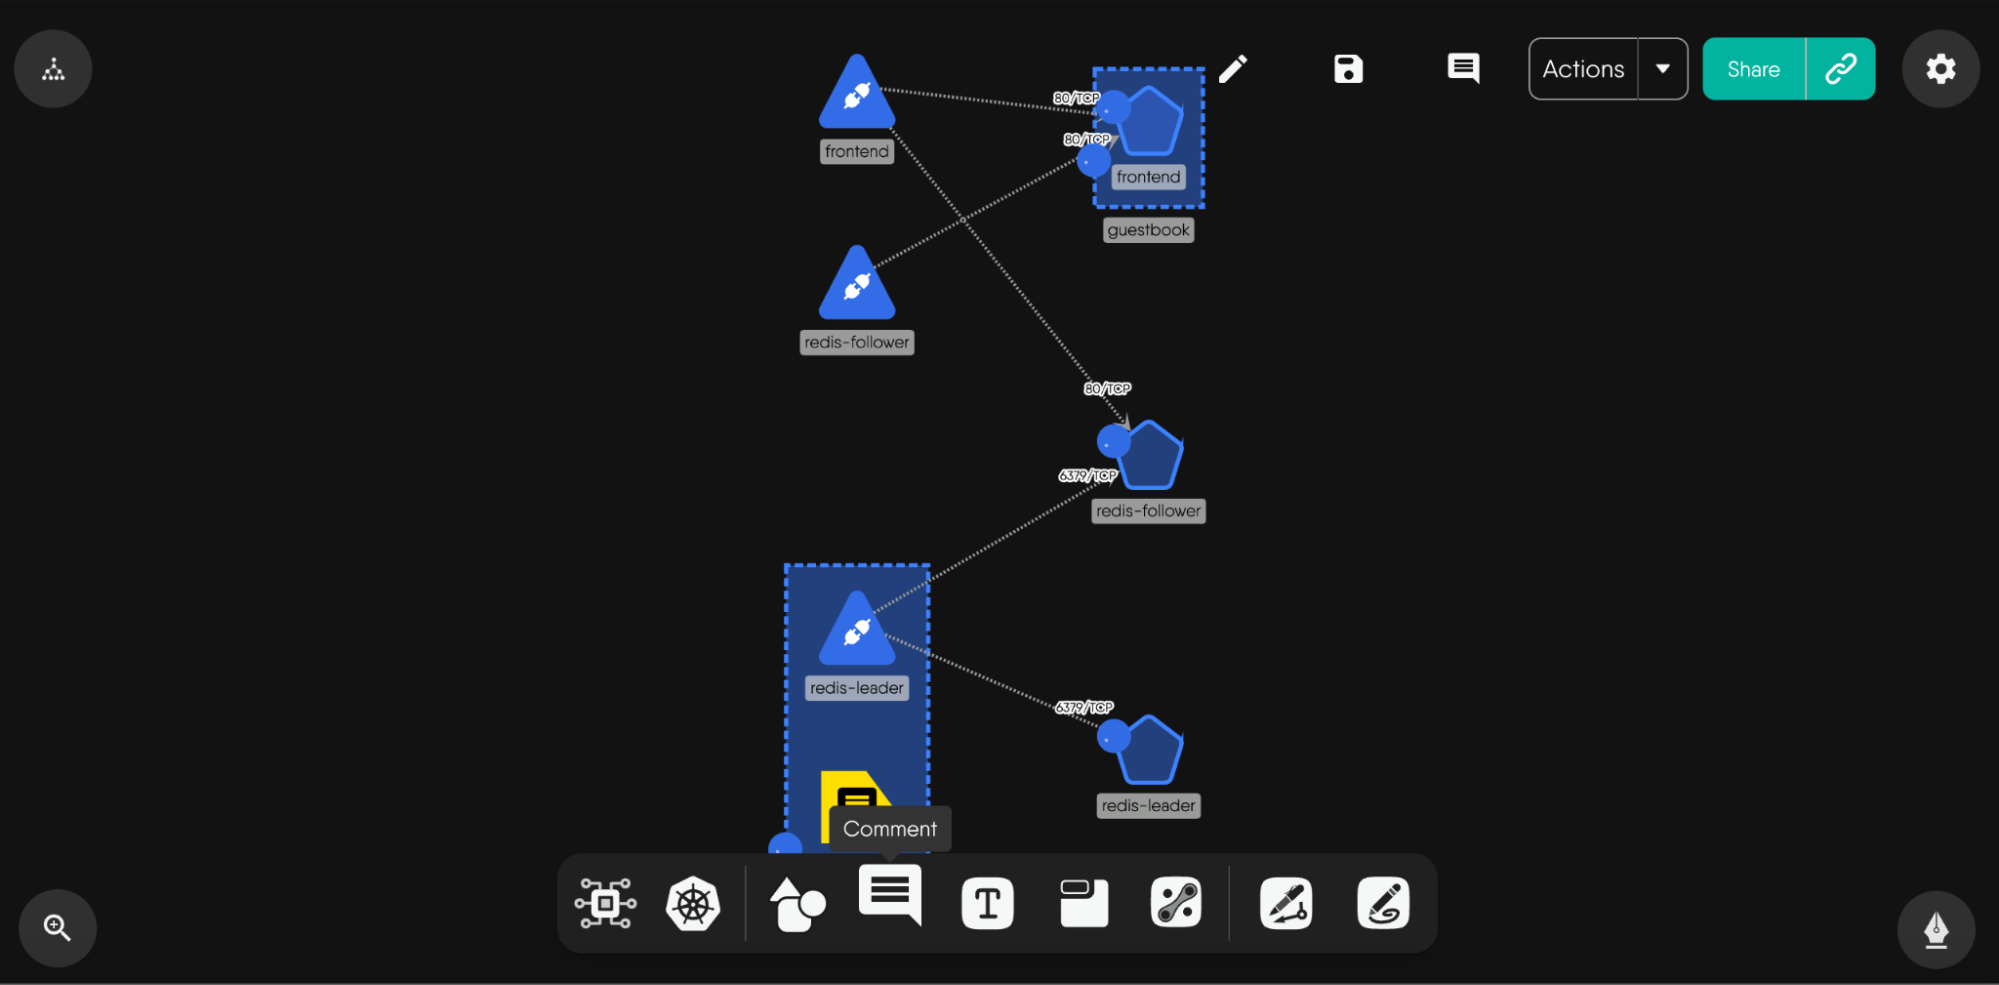
This image illustrates the feature of pinning comments to specific nodes within Kanvas. This functionality allows users to attach a comment to a particular node, ensuring that the comment remains associated with the node regardless of its position within the design. This is particularly useful for providing context-specific feedback or instructions that should always be visible alongside the relevant component. You can take a comment icon near to a node and it automatically gets pinned to that node.
How It Works:
1* **Attach Comments:** When a comment is pinned to a component, it stays linked to that node. This means that no matter where the node is moved within the design, the comment will follow.2* **Contextual Feedback:** This feature helps in maintaining the relevance of the feedback, as the comments are always displayed in relation to the specific node they refer to.3* **Collaborative Consistency:** Ensures that all collaborators see the comments in the correct context, facilitating clearer communication and understanding.
Locking Comments
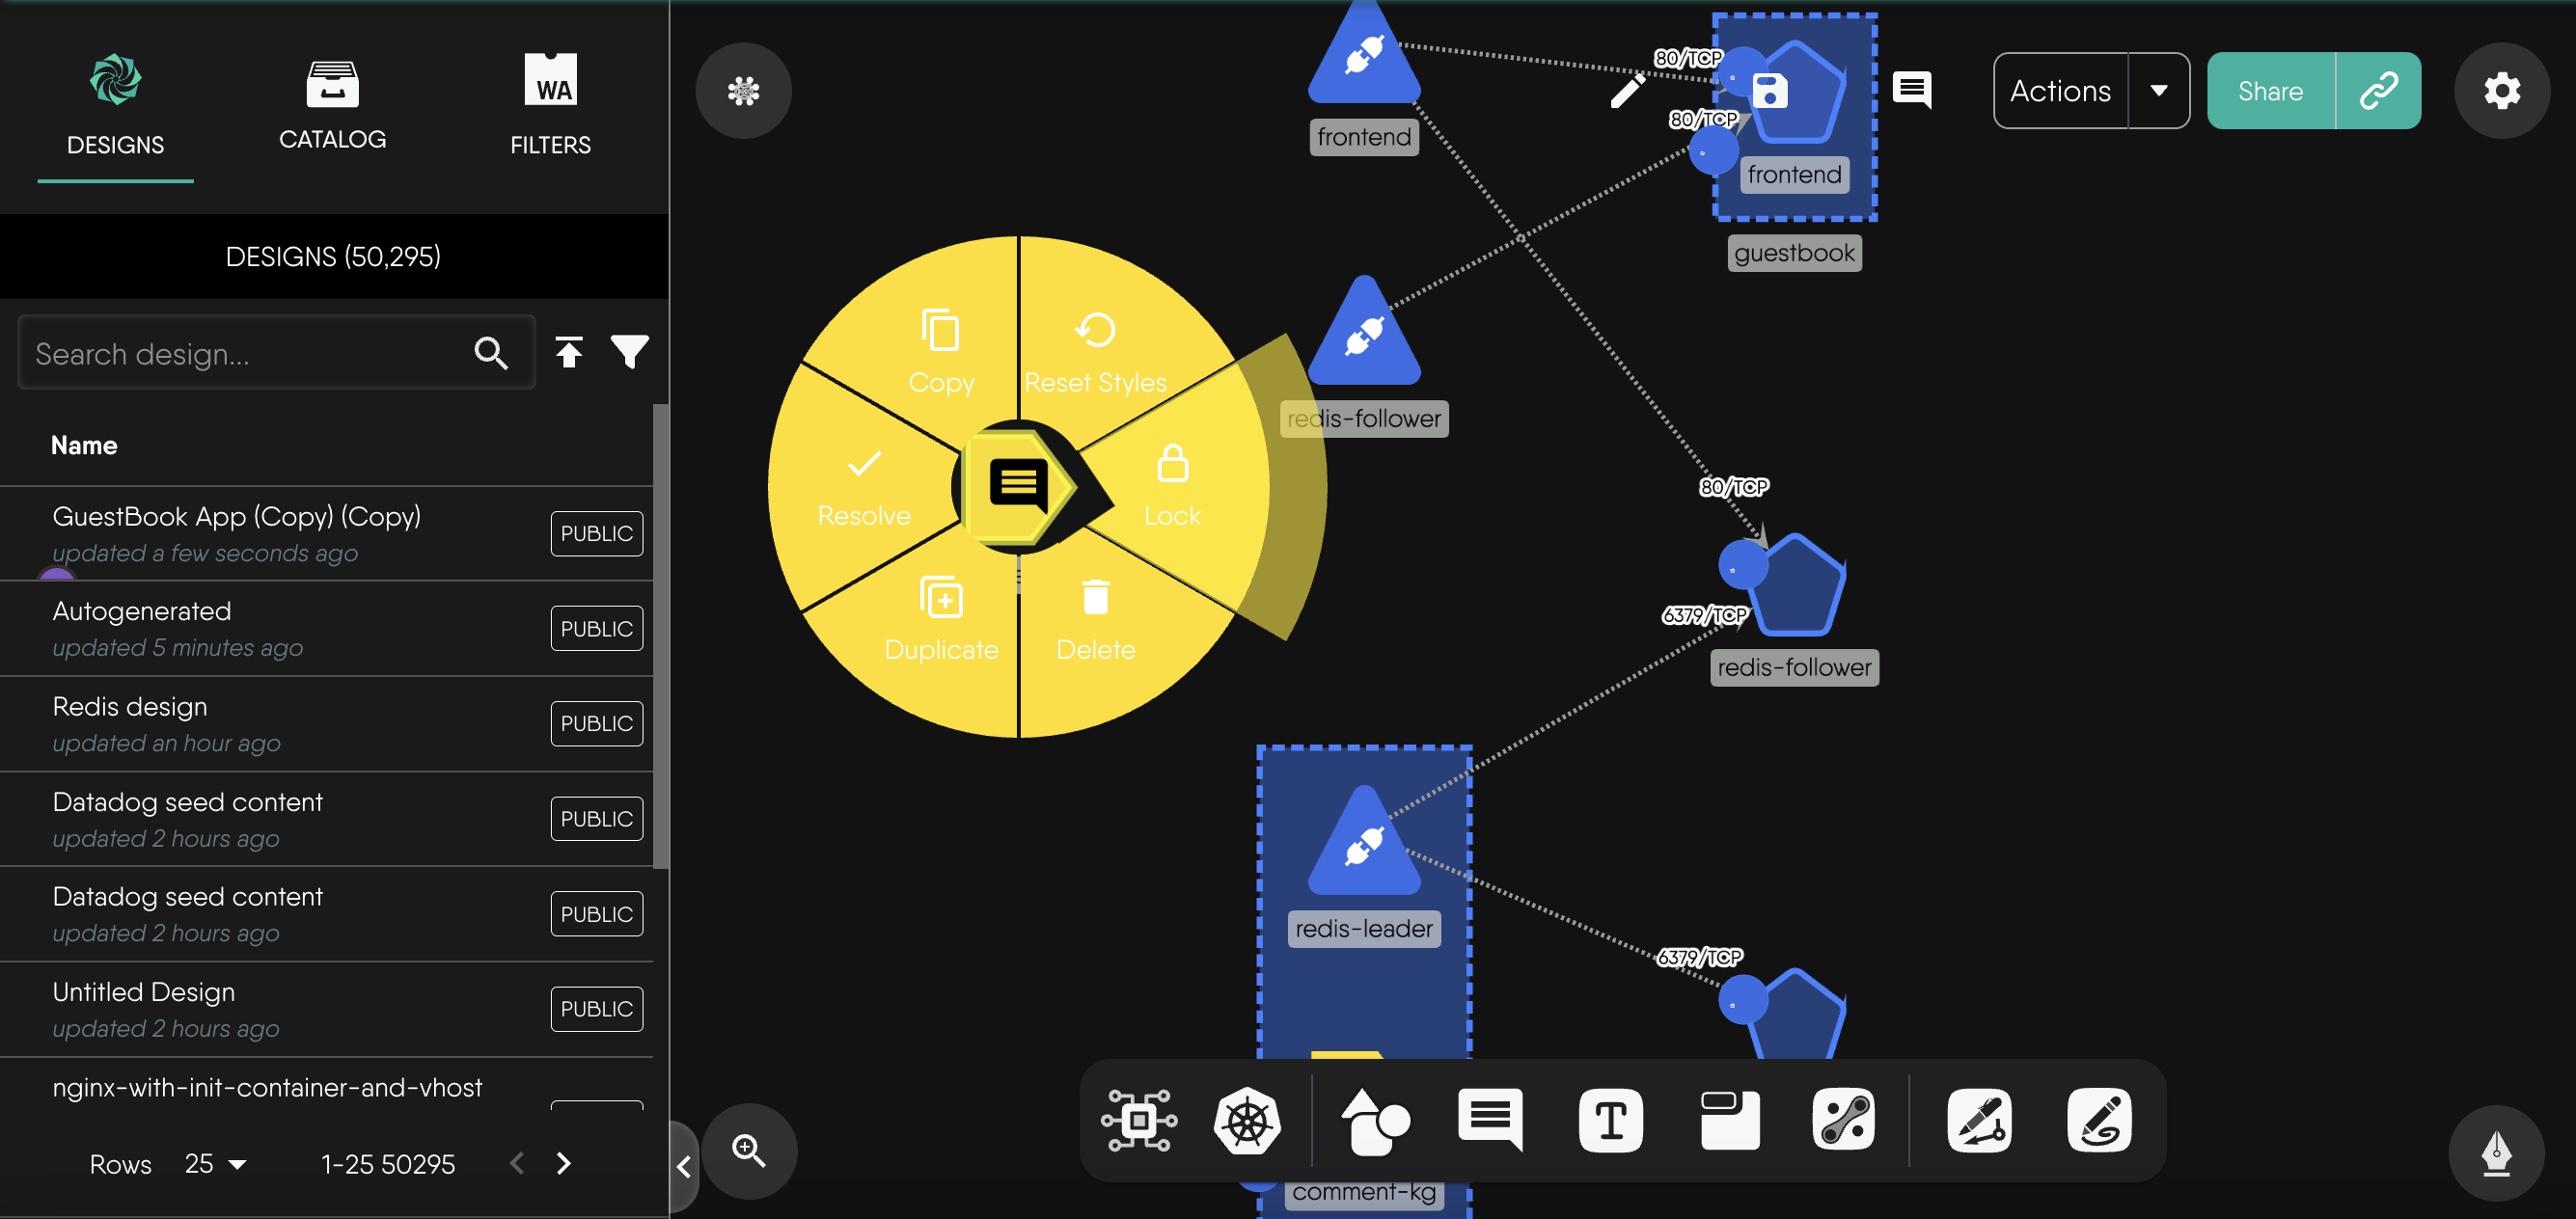
This image shows the locking and unlocking interface for nodes in Kanvas. Right-click on the node to access the “lock” option. Locking a comment ensures that it remains fixed in its position, even if the overall design pattern changes. This is useful for highlighting and securing key components of the design that should not be altered or moved during collaborative sessions.
How It Works:
1* **Lock Comments:** By locking a comment, you ensure that it stays in place. This can be particularly useful for critical components that form the backbone of your design.2* **Shared Among Collaborators:** When a comment is locked, collaborators working on that design will be unable to move or reposition the locked component. This is an excellent opportunity to brainstorm suggestions for easily identifying locked components.3* **Unlocking Comments:** Comments can be unlocked when necessary, allowing for flexibility in design adjustments. This can be done through the radial menu shown in the image, which provides options for copying, resetting styles, duplicating, deleting, and unlocking nodes.
Design Reviews with Annotations
Annotations in Kanvas are a powerful way to add detailed notes and explanations directly onto your design canvas. They are crucial for effective communication, detailed feedback, and collaborative design processes. Here’s how you can effectively use annotations to enhance collaboration and streamline design reviews.
Whiteboard in Kanvas
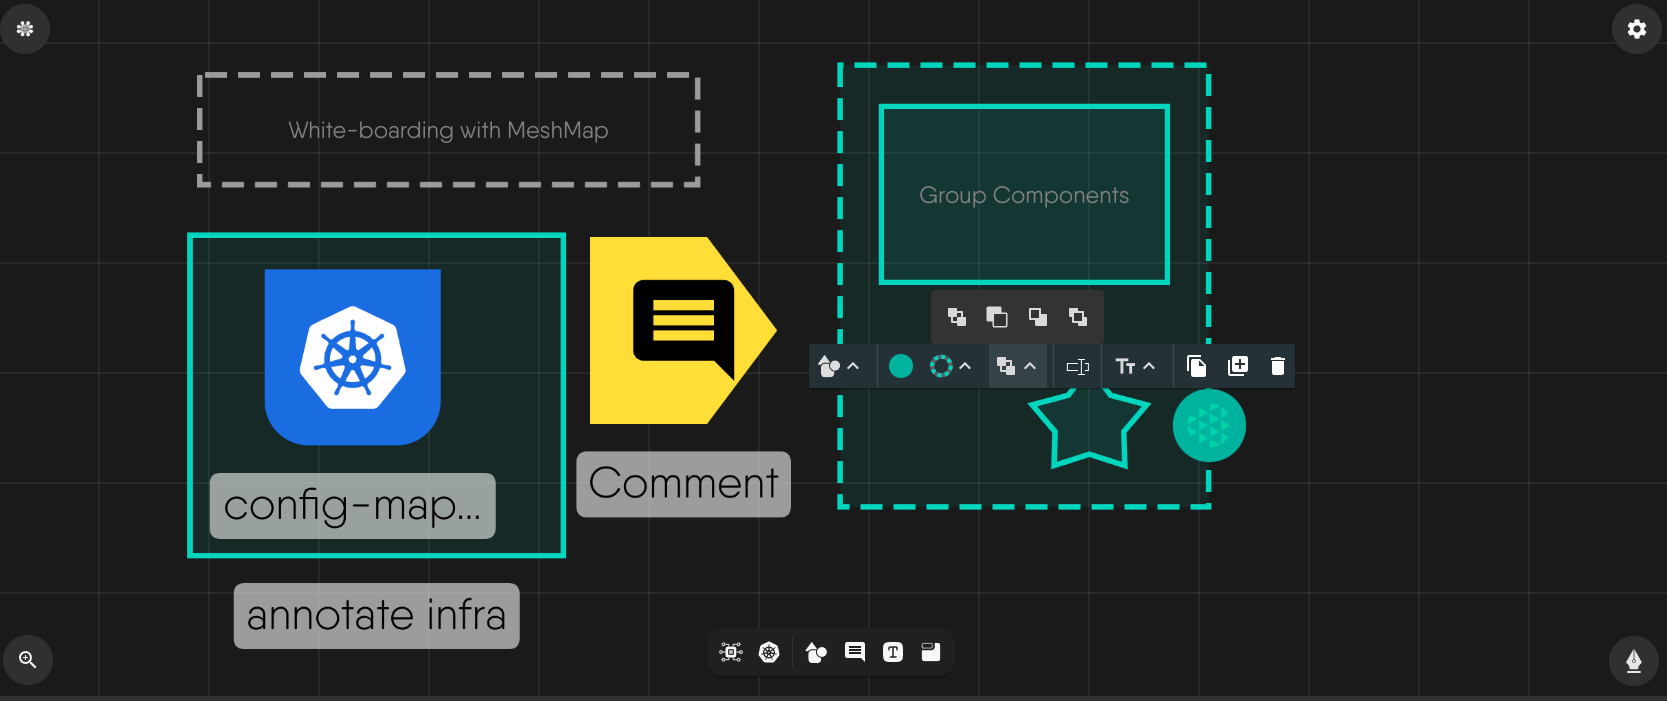
The whiteboarding feature in Kanvas introduces versatile, freestyle drawing capabilities. Enabling the whiteboard feature augments your ability to diagram with a suite of predefined shapes, and pen and pencil annotations, allowing you full freedom of expression in your engineering diagrams. Annotations are a key part of this feature, enabling you to add contextual information directly to your designs.
Key Functionalities
Drawing Tools Integration:
- The whiteboarding feature incorporates a comprehensive set of drawing tools resembling popular whiteboard applications.
- It enables you to draw shapes, group components, annotate, and highlight specific elements within the design canvas to help convey complex ideas clearly
Real-time Collaboration:
- Facilitates simultaneous collaboration among multiple users within the tool.
- Identification of collaborators through avatars ensures clarity in collaborative sessions.
- Supports live editing and instant visualization of changes made by collaborators, ensuring everyone is on the same page.
Non-Invasive Annotations: Annotations, shapes, or drawings created within the tool remain separate visual aids, not altering the actual infrastructure components. This means you can annotate freely without worrying about modifying the core design elements.
Undo/Redo Functionalities: Allows for design exploration without permanent modifications, enabling you to experiment with different ideas safely.
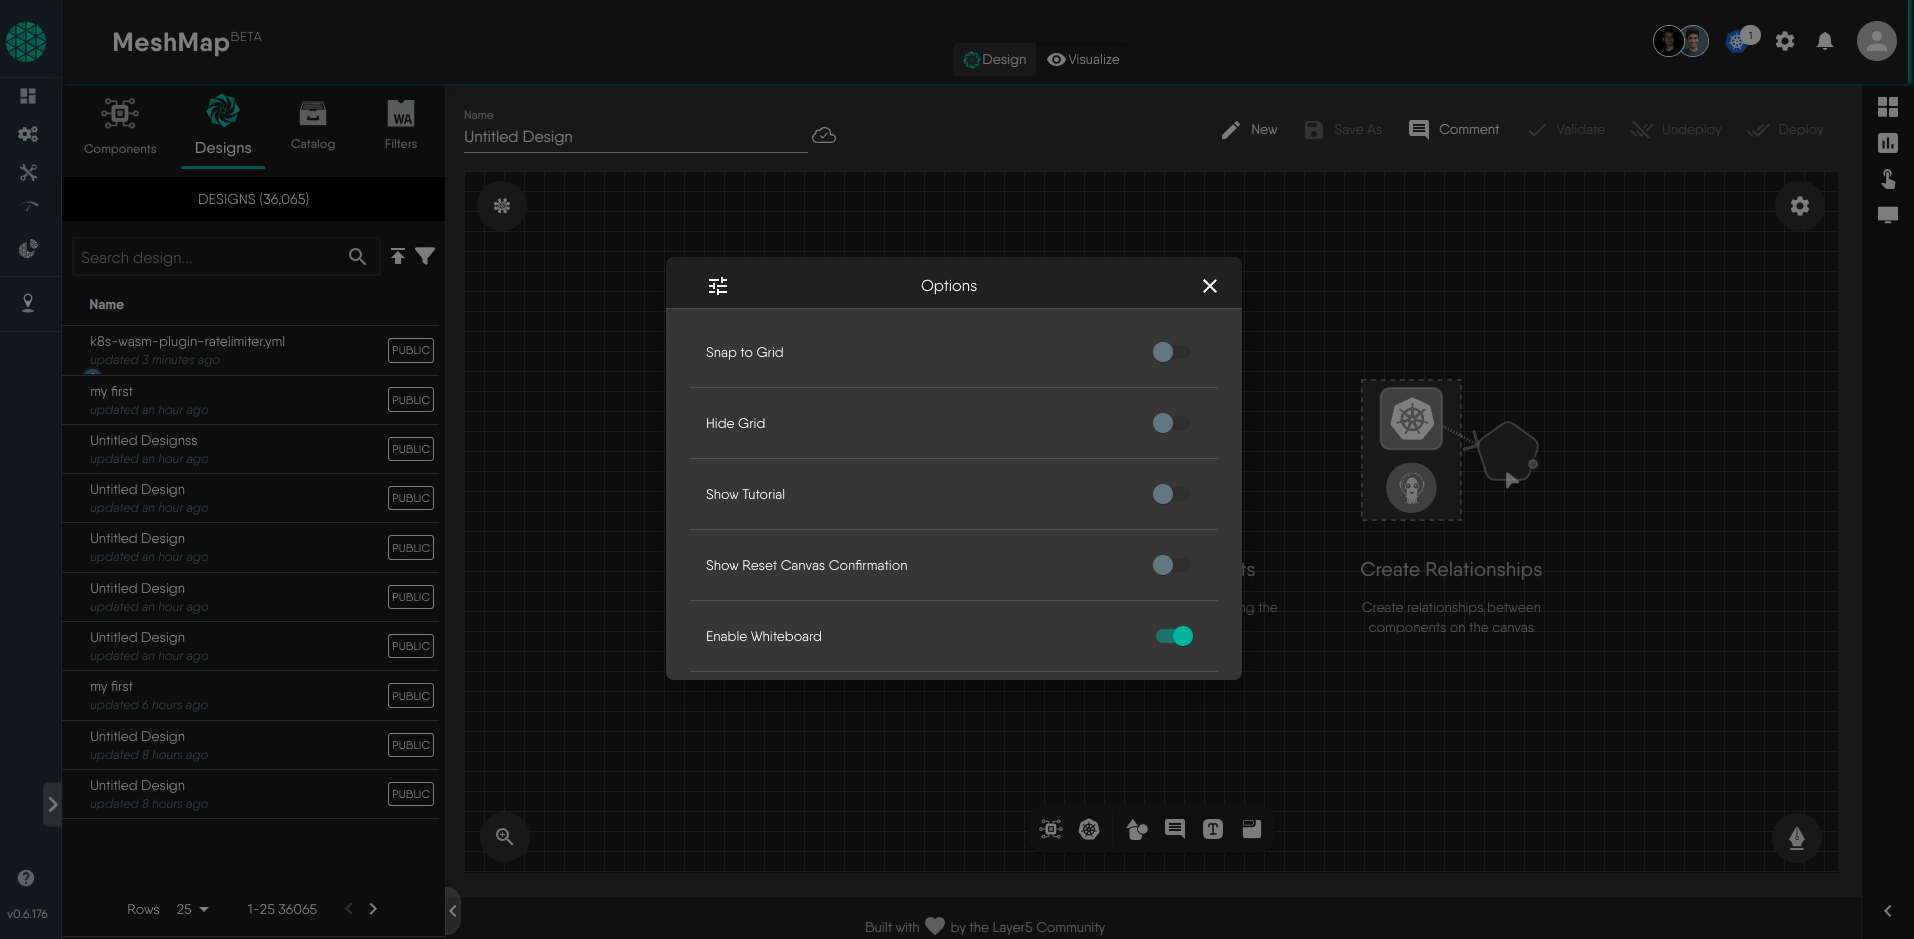
Enabling the Whiteboarding Feature
If the whiteboarding feature is not already enabled, follow these steps to access it within Kanvas:
- Right-click to open the context menu or Click on the settings icon at the top right of the design canvas.
- Select Options to access the Preferences menu.
- Enable Whiteboard.
- A dock will now appear at the bottom of the canvas, providing access to the whiteboard tools.
- Experiment with drawing, annotation, and collaboration functionalities available in the whiteboard toolbar.
- Share access with collaborators or team members to engage in real-time collaborative drawing sessions.
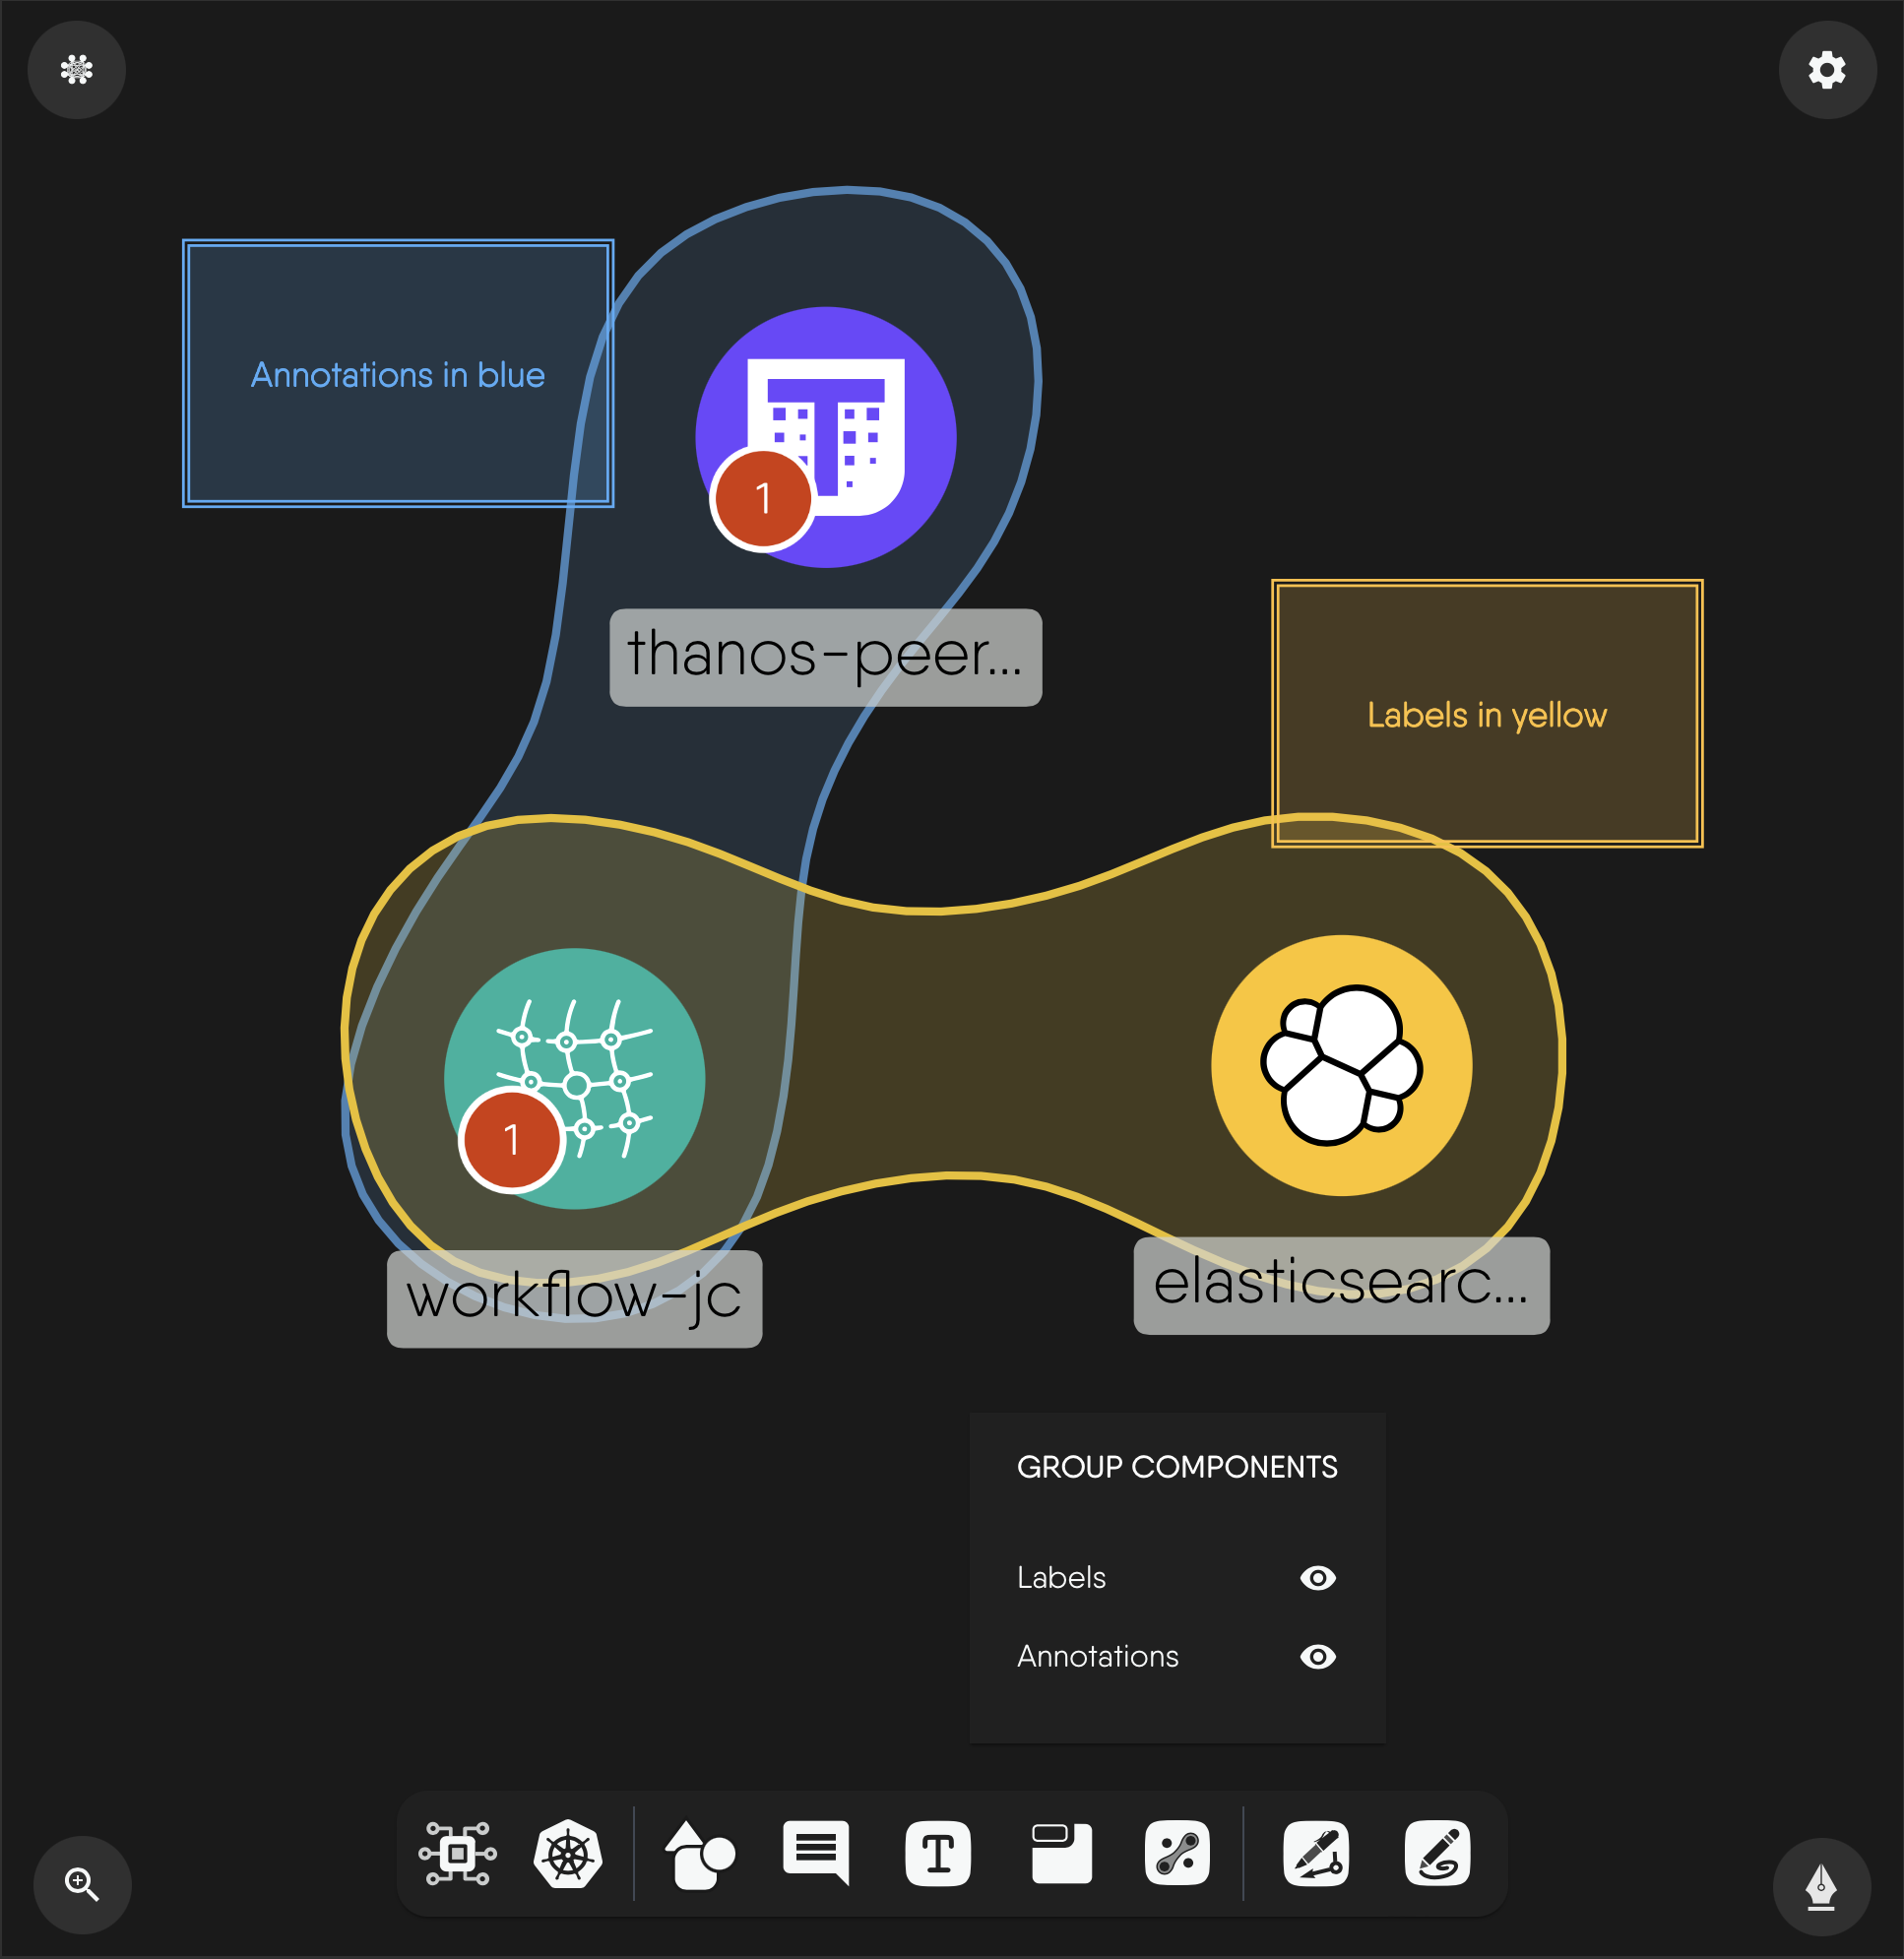
Customizing Annotations and Shapes
Customizing annotations and shapes is crucial in design reviews as it enhances clarity and communication within the team. By tailoring annotations and shapes to fit specific needs, team members can highlight important aspects, provide detailed feedback, and visually differentiate components within the design. This level of customization ensures that feedback is clear, actionable, and directly tied to the relevant parts of the design, making the review process more efficient and effective.
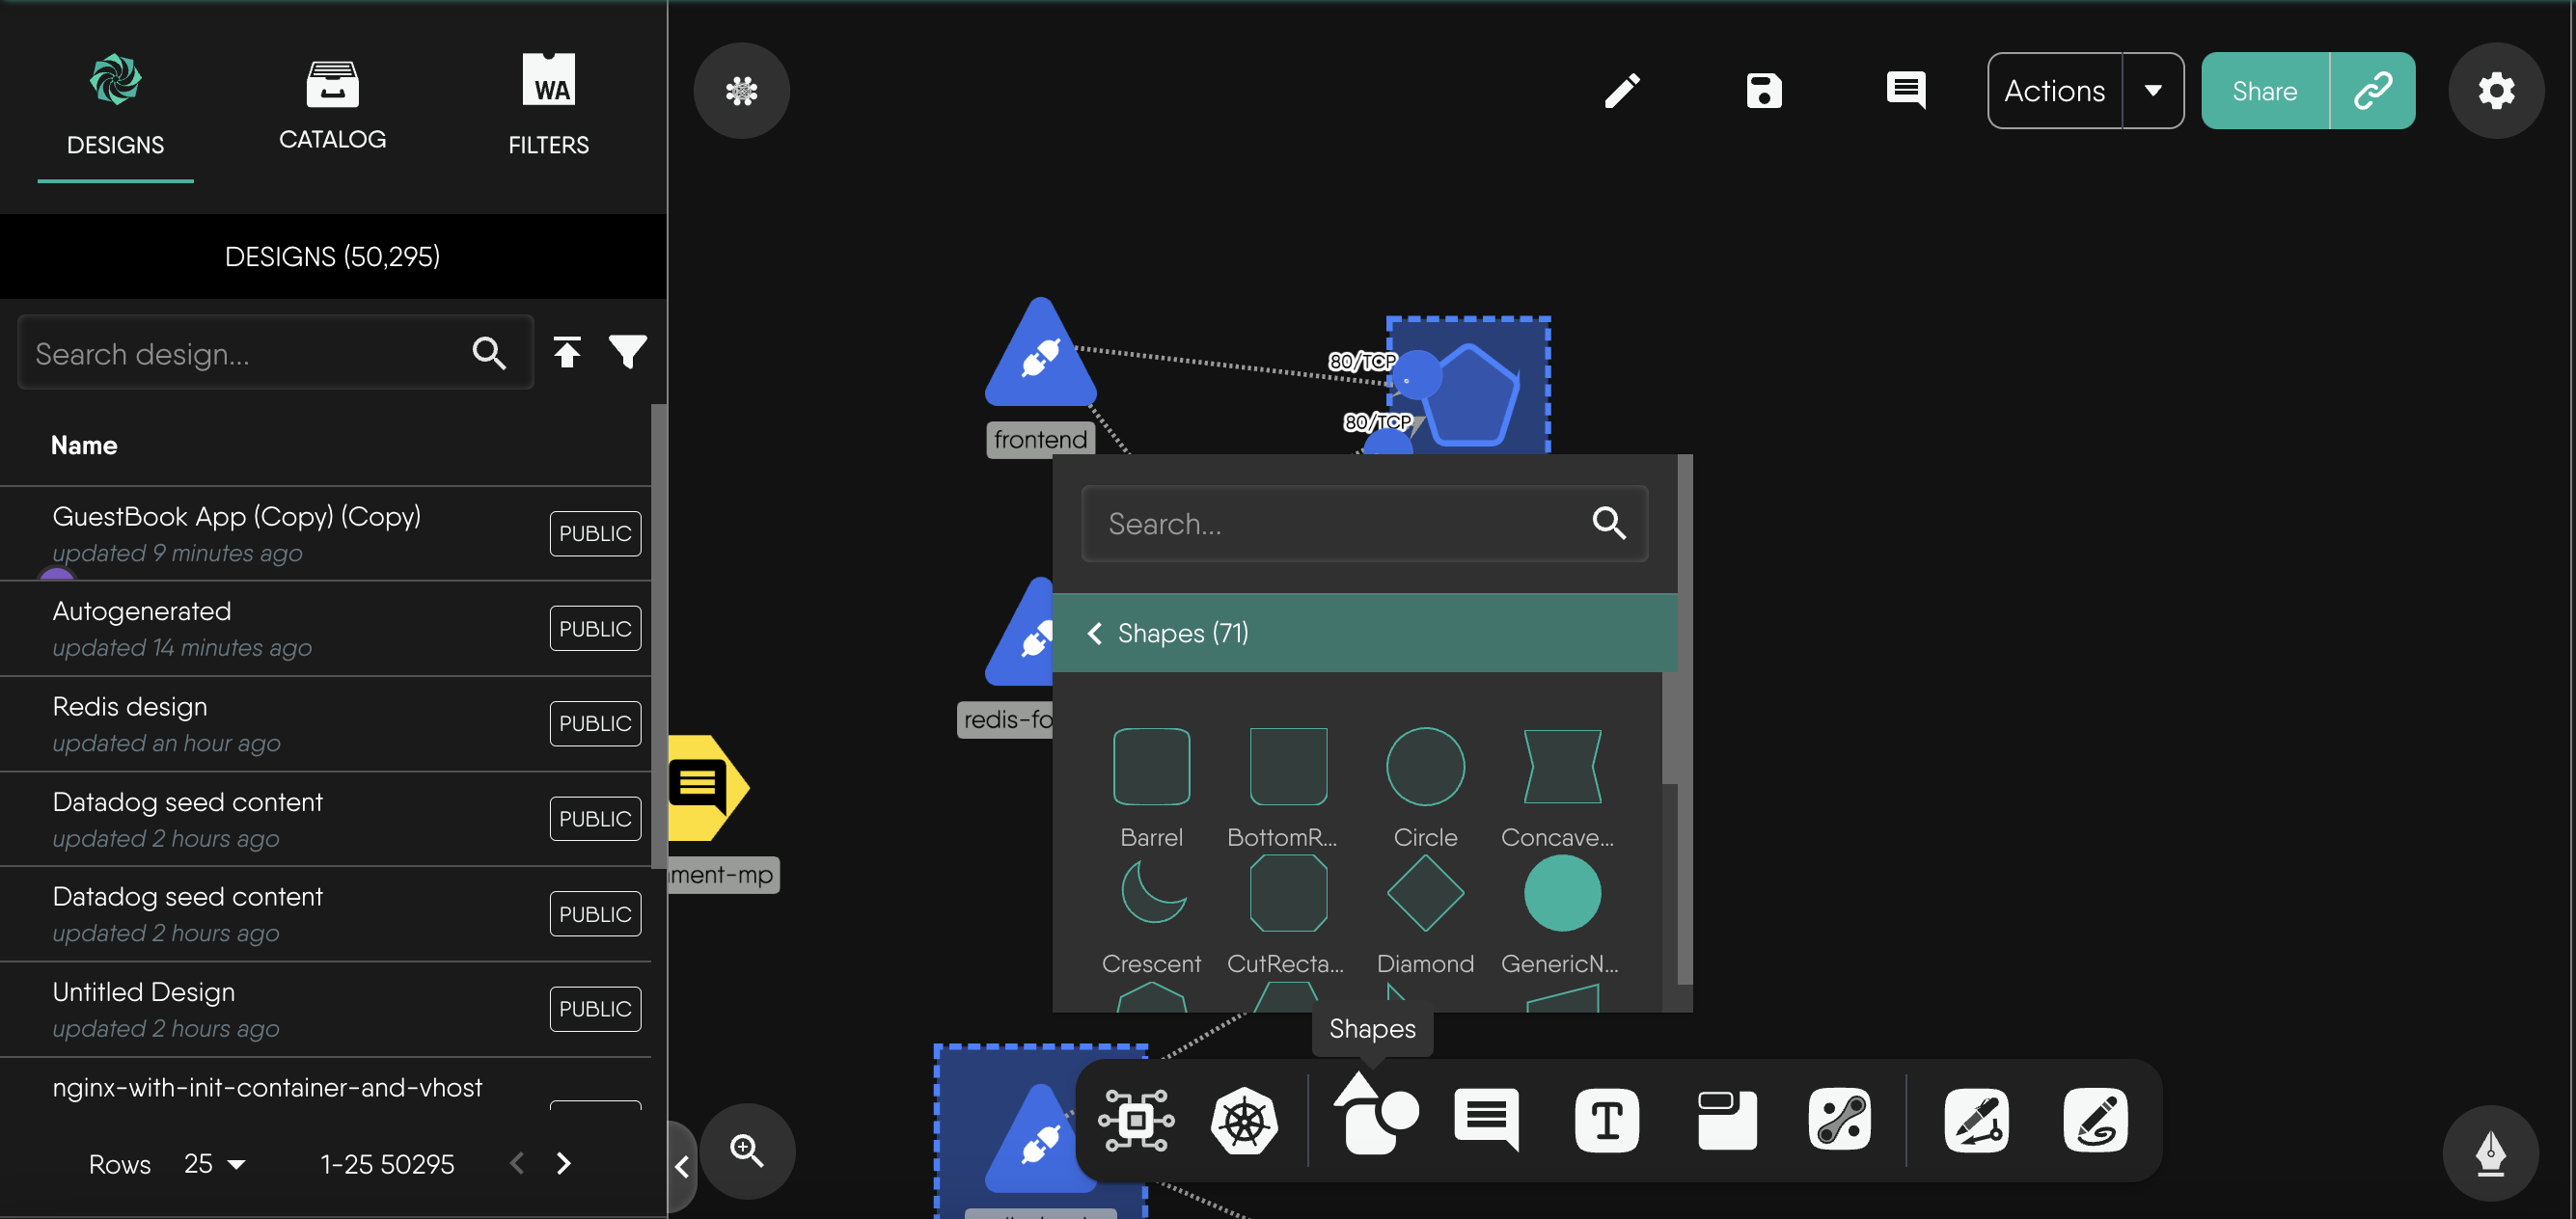
- Shape Customization: Shapes within the canvas offer flexibility. Select any shape to access a tooltip with options to resize, reshape, and change colors. This allows for precise adjustments similar to popular design software.
- Text Annotation Customization: Text annotations come with various options. Customize fonts, sizes, alignments, and styles easily. Text boxes resize for seamless integration with the canvas.
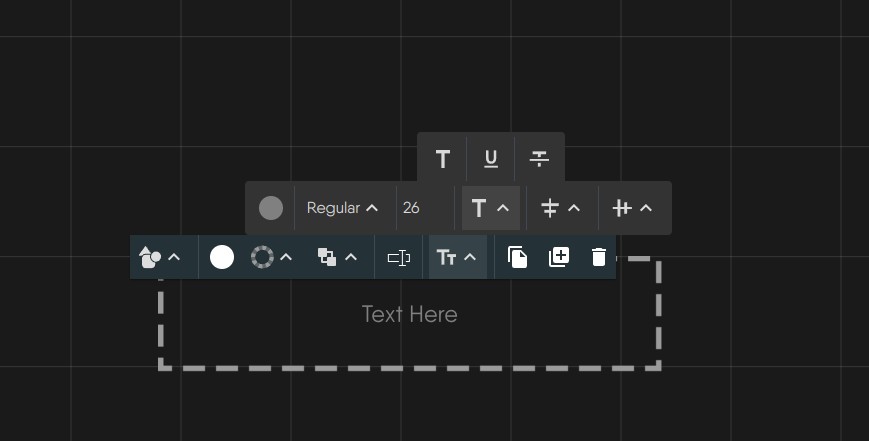
- Interactive Tooltip Interface: The tooltip is your gateway to customization. It’s simple and intuitive, offering a range of editing options upon selection. It’s designed for easy navigation, mirroring popular design software.

Advanced Customization Features:
- Manage layers and group elements to organize your design better. These advanced tools ensure collaborative work while preserving design integrity.
- Lines and edges are easily manipulated. Adjust thickness, style, and endpoints effortlessly. Drag line segments to create bends or curves, adding detail to visual representations.
Consistent Functionality: The customization tools apply uniformly to all annotation types. Changes made within the tooltip reflect instantly on the canvas, facilitating real-time collaboration.
Annotation Use Cases in Design Reviews
Team Collaboration: Multiple users collaborating on infrastructure designs, adding annotations and insights simultaneously. This helps in gathering diverse perspectives and improving the design quality.
Educational Context: Instructors and students using the tool for visualizing concepts or workflows in remote learning environments. Annotations can be used to highlight key points and provide additional explanations.
Documenting Design Decisions: Annotations help in documenting design decisions and ensuring all stakeholders are aligned.
Annotations in Kanvas’s Designer Mode are an invaluable tool for enhancing collaboration and streamlining the design review process. By integrating versatile drawing tools, enabling real-time collaboration, and preserving the integrity of the infrastructure, annotations provide a powerful way to communicate, document, and iterate on design ideas. Whether you are working in a team, educating others, or planning complex projects, using annotations effectively can significantly improve the quality and clarity of your designs.
Best Practices for Effective Design Reviews
Provide clear and actionable feedback Provide specific feedbackthat the designer can act on. Vague comments can lead to misunderstandings and delays in the design process. Support your feedback with examples or references. This can help clarify your point and provide the designer with tangible suggestions for improvement.
Balance positive and contructive feedback Frame feedback in a constructive manner, focusing on how things can be improved rather than just pointing out flaws. Acknowledge what works well in the design before delving into areas that need improvement. This helps maintain a positive and collaborative atmosphere.
Regularly check and respond to comments Stay engaged in the review process. Regularly check and respond to comments to keep the conversation alive and ensure a smooth workflow.
Prioritize feedback Highlight the most critical feedback first. This ensures that the designer focuses on the most important aspects for improvement.
In conclusion, effective design reviews in Kanvas' Designer Mode are essential for fostering collaboration, ensuring clear communication, and achieving high-quality outcomes. By leveraging features like comments, annotations, and customization, teams can provide actionable feedback, maintain design integrity, and align on project goals. Following best practices for feedback and utilizing the full range of tools Kanvas offers will streamline the review process, leading to more robust and well-documented designs.


