
Recently, I started learning on Service Mesh and it was a very interesting journey as I explored the Service Mesh landscape starting with Layer5 tutorials and by exploring the blogs at Istio.io.
Our organization decided to use the features of Istio for securing, managing and automating microservices. However, we have to support a multi-tenant environment and that became a challenge due to lack of sufficient documentation and clarity. To give a little bit of background on the problem, we have a single cluster with multiple tenants in different namespaces sharing the same cluster . We do not want to provide each tenant their own separate Kubernetes Cluster because that would be additional provisioning overhead, management overhead and also additional resource overhead on the platform.
In this blog, I will go over the concepts and visual representation as well as the steps to learn and build your setup. Now there are different combinations possible depending on the requirements. These could be :
- Single Istio Control Plane with its own Ingress-Gateway to ensure traffic for the control plane is coming via the same control plane Ingress-Gateway.
- One or more Workspace namespaces for the workload applications and each with its own instance of the ingress gateway
- More advanced scenario would be multiple Control Plane and its associated Data Plane or essentially Multiple Service Mesh within a single Kubernetes Cluster. This is presently feasible using the Maistra Istio Operator, but its not fully supported using the upstream Istio at present. I intend to go over this use case in a later article.
Here by Ingress Gateway we mean the Istio Ingress Gateway and not the Kubernetes Ingress Gateway. Now, before we get into the steps for building an Istio Multi-tenant setup, lets quickly review the prerequisite :
Kubernetes setup (in the steps below I am using v1.18 on ubuntu 18.04)
1$ sudo apt-get install -y docker.io2$ sudo sh -c “echo ‘deb http://apt.kubernetes.io/ kubernetes-xenial main’ >> /etc/apt/sources.list.d/kubernetes.list”3$ sudo sh -c “curl -s https://packages.cloud.google.com/apt/doc/apt-key.gpg | apt-key add -”4$ sudo apt-get update5$ sudo apt-get install -y kubeadm=1.18.1–00 kubelet=1.18.1–00 kubectl=1.18.1–006$ sudo kubeadm init — kubernetes-version 1.18.1 — pod-network-cidr 192.168.0.0/167$ mkdir -p $HOME/.kube8$ sudo cp -i /etc/kubernetes/admin.conf $HOME/.kube/config9$ sudo chown $(id -u):$(id -g) $HOME/.kube/config10$ kubectl apply -f https://docs.projectcalico.org/manifests/calico.yamlGet the latest istioctl binary
1$ curl -L https://git.io/getLatestIstio | sh -2cd istio-*3export PATH=$PWD/bin:$PATH4istioctl versionInitialize the Istio Operator
1$ istioctl operator init2Using operator Deployment image: docker.io/istio/operator:1.6.33✔ Istio operator installed4✔ Installation complete5$ kubectl get all -n istio-operator6NAME READY STATUS RESTARTS AGE7pod/istio-operator-5998f6c744-vrkbk 1/1 Running 1 78m8NAME TYPE CLUSTER-IP EXTERNAL-IP PORT(S) AGE9service/istio-operator ClusterIP 10.107.183.94 <none> 8383/TCP 78m10NAME READY UP-TO-DATE AVAILABLE AGE11deployment.apps/istio-operator 1/1 1 1 78m12NAME DESIRED CURRENT READY AGE13replicaset.apps/istio-operator-5998f6c744 1 1 1 78m
Next we will look into the details of the multitenancy scenarios; but before that a few word on the Istio operator would be nice. The Istio Operator follows the Kubernetes Controller and Custom Resource Definition mechanism and basically the above steps create an Istio operator controller in the istio-operator namespace and also registers the CRDs in the Kubernetes Registry. Basically, it extends the API for Kubernetes and allows management of a Custom Resource(CR). A word of caution, the existing upstream Istio Operator does not follow any Operator Framework like kubebuilder or Operator SDK. Hence, many of the expected behavior fail like trying to create two Istio Operator Custom Resource(the community mentions it as iop instances) in different namespaces or multiple iop instances and are under heavy development.
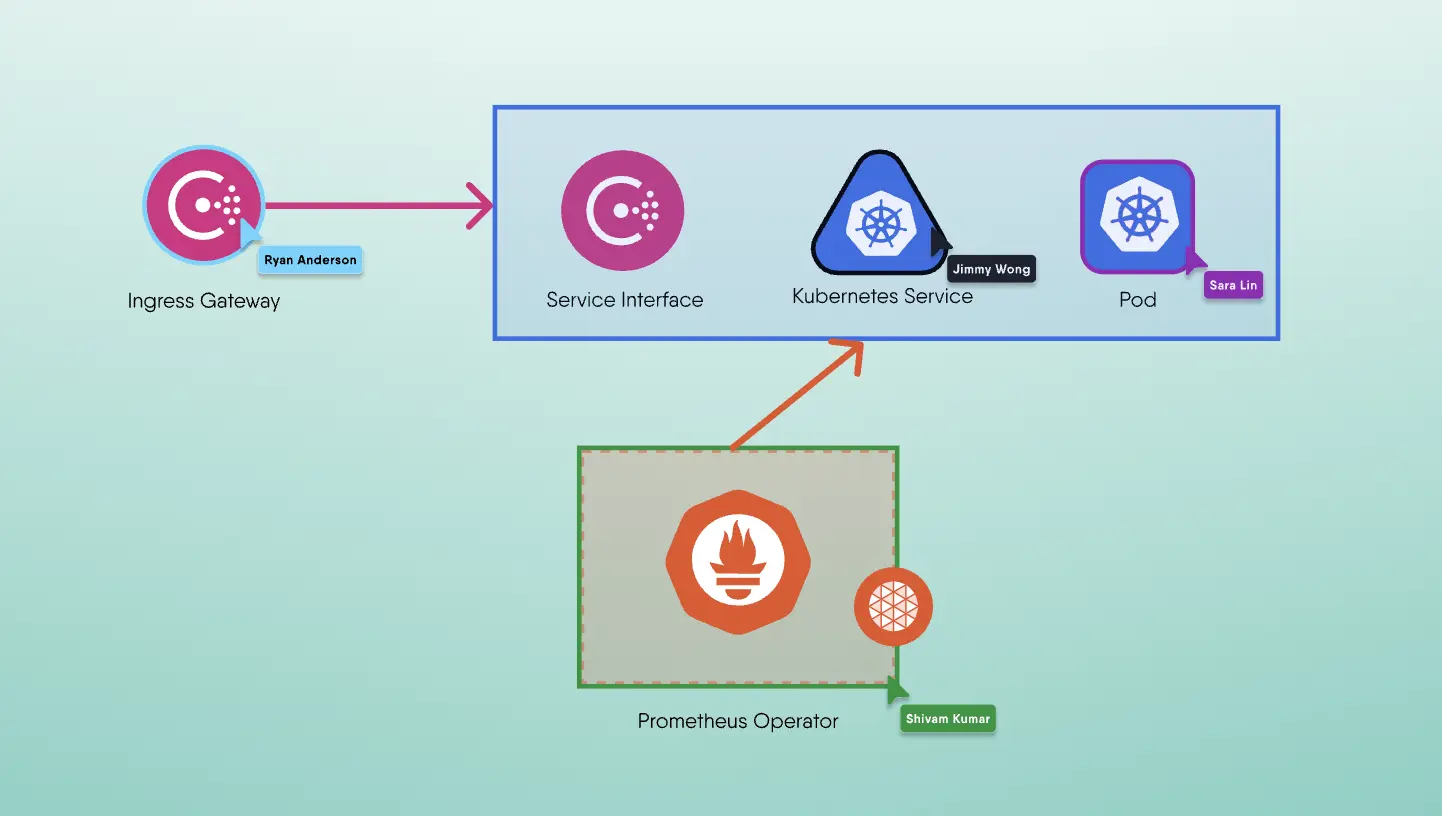
Ok, so now lets jump into action. We will build our Istio Setup for the scenario 1 &2 above shown in the diagram below. There are three different instances of Ingress Gateway(and it could be egress gateway as well) :
a. Ingress Gateway in Control Plane for traffic entry point to the Control plane Observability Components like Kiali(for the Service Mesh Graph), Prometheus(for metrics),Grafana(for visual charts of the metrics)and Jaeger (for distributed tracing between the services)
b. Ingress Gateway in the Worskpace 1 namespace for traffic entry point to the workspace 1 microservices.
c. Ingress Gateway in the Worskpace 2 namespace for traffic entry point to the workspace 2 microservices.
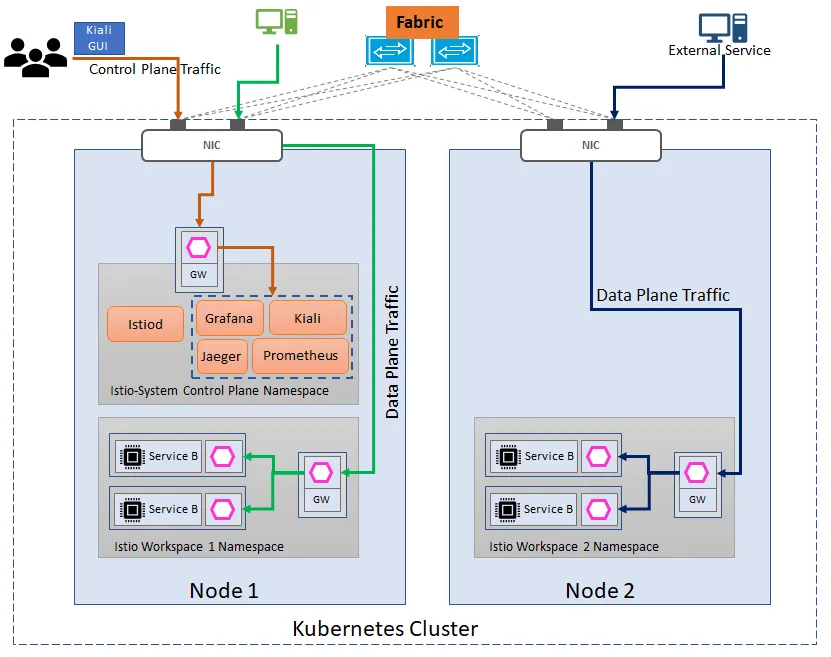
Single Control Plane with Multiple Data Plane each with separate Ingress Gateway
- Creation of Control Plane CR and Data Plane CR
A sample CR for creation of the Control plane and Data Plane CR can be referred below :1$ cat iop-platform.yaml2apiVersion: install.istio.io/v1alpha13kind: IstioOperator4metadata:5namespace: istio-system6name: platform-istiocontrolplane7spec:8profile: demo9$ cat iop-wk1-gw.yaml10apiVersion: install.istio.io/v1alpha111kind: IstioOperator12metadata:13namespace: istio-system14name: wk1-gwconfig15spec:16profile: empty17components:18ingressGateways:19— name: wk1-ingressgw20namespace: workspace-121enabled: true22label:23istio: ingressgateway-124app: istio-ingressgateway-125values:26gateways:27istio-ingressgateway:28debug: error29$ cat iop-wk2-gw.yaml30apiVersion: install.istio.io/v1alpha131kind: IstioOperator32metadata:33namespace: istio-system34name: wk2-gwconfig35spec:36profile: empty37components:38ingressGateways:39— name: wk2-ingressgw40namespace: workspace-241enabled: true42label:43istio: ingressgateway-244app: istio-ingressgateway-245values:46gateways:47istio-ingressgateway:48debug: error
It is important to make sure the indentation is correct ,otherwise it would lead to errors. Reference: Istio Website
Deploy the CRs using kubectl:
1$ kubectl create ns istio-system2$ kubectl create ns workspace-13$ kubectl create ns workspace-24$ kubectl apply -f ../iop-platform.yaml5istiooperator.install.istio.io/platform-istiocontrolplane created6$ kubectl apply -f ../iop-wk1-gw.yaml7istiooperator.install.istio.io/wk1-gwconfig configured8$ kubectl apply -f ../iop-wk2-gw.yaml9istiooperator.install.istio.io/wk2-gwconfig configured
- Troubleshooting the Istio Operator Controller.
Its a good idea to run another window and execute the below command to observe the running logs on the controller pod.1$ kubectl logs -f -n istio-operator2$(kubectl get pods -n istio-operator -lname=istio-operator -o jsonpath=’{.items[0].metadata.name}’)
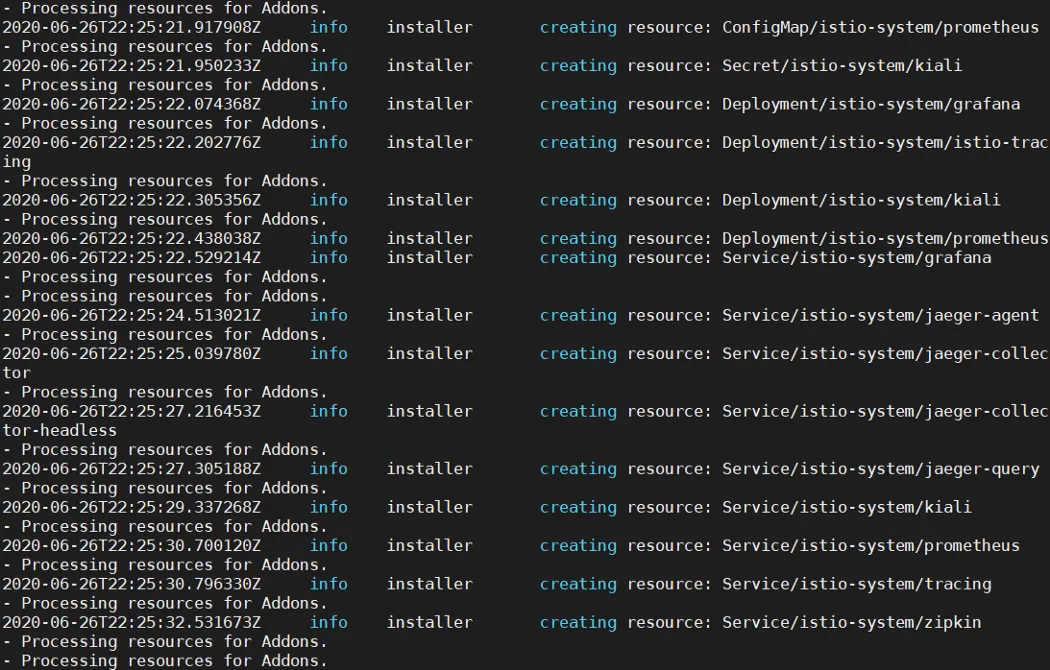
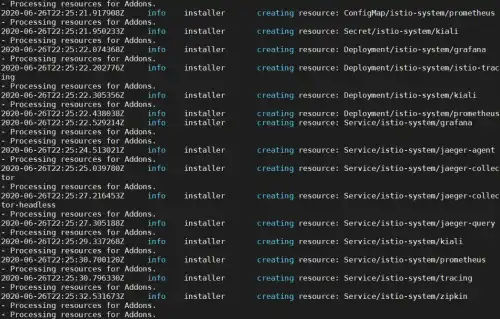
Observe the created objects in istio-system and the workspace namespaces for all pods to be in running state.
1$ kubectl get all -n istio-system2NAME READY STATUS RESTARTS AGE3pod/grafana-b54bb57b9-k84xf 1/1 Running 0 79s4pod/istio-egressgateway-77c7d594c5-fr79j 1/1 Running 0 83s5pod/istio-ingressgateway-766c84dfdc-p6g6t 1/1 Running 0 83s6pod/istio-tracing-9dd6c4f7c-ndjvn 1/1 Running 0 79s7pod/istiod-7b69ff6f8c-9gwp8 1/1 Running 0 94s8pod/kiali-d45468dc4–4sww2 1/1 Running 0 79s9pod/prometheus-5fdfc44fb7–67khx 2/2 Running 0 78s10<truncated>11esudbat@istio:~/istio$ kubectl get all -n workspace-112NAME READY STATUS RESTARTS AGE13pod/wk1-ingressgw-5674488c8b-fg2w5 1/1 Running 0 21s14<truncated>15esudbat@istio:~/istio$ kubectl get all -n workspace-2Now we will label the namespaces for istio-injection
1$kubectl label namespace workspace-1 istio-injection=enabled2$kubectl label namespace workspace-2 istio-injection=enabledNow we will deploy the bookinfo sample application in both namespaces but before that we need to make sure that the Gateway resource is updated with the correct label selector as below :
1$ cat istio/bookinfo-gateway-1.yaml2apiVersion: networking.istio.io/v1alpha33kind: Gateway4metadata:5name: bookinfo-gateway6spec:7selector:8istio: ingressgateway-1 # use istio gateway-1 controller in workspace-19servers:10— port:11number: 8012name: http13protocol: HTTP14hosts:15— “*”16$ cat istio/bookinfo-gateway-2.yaml17apiVersion: networking.istio.io/v1alpha318kind: Gateway19metadata:20name: bookinfo-gateway21spec:22selector:23istio: ingressgateway-2 # use istio gateway-2 controller in workspace-124servers:25— port:26number: 8027name: http28protocol: HTTP29hosts:30— “*”
Deploy the applications in workspace-1 and workspace-2 and deploy the Gateway,VirtualService and DestinationRules.
1$kubectl apply -f samples/bookinfo/platform/kube/bookinfo.yaml -n workspace-12$kubectl apply -f samples/bookinfo/platform/kube/bookinfo.yaml -n workspace-23$kubectl apply -f samples/bookinfo/networking/bookinfo-gateway.yaml -n workspace-14$kubectl apply -f samples/bookinfo/networking/bookinfo-gateway.yaml -n workspace-25$kubectl apply -f samples/bookinfo/networking/destination-rule-all-mtls.yaml -n workspace-16$kubectl apply -f samples/bookinfo/networking/destination-rule-all-mtls.yaml -n workspace-2
Essentially what is happening is the Gateway CR is configuring the traffic to come via the ingress-gateway, it specifies the label selector based on which the ingress-gateway is selected and the host from where the traffic is allowed and port on which the traffic is allowed. It is important to ensure the label maps the label on the ingress-gateway. Once this is done the traffic will start flowing the intended gateway and it could be observed on the Kiali dashboard. Please note that in this scenario the Kiali is also accessed via the default control plane ingress-gateway running in the istio-system control plane namespace.
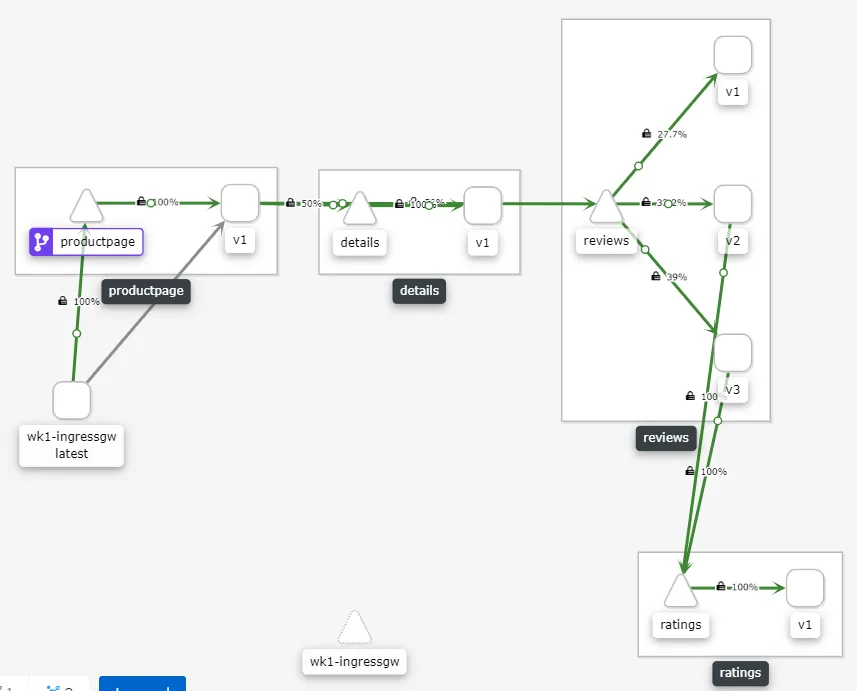
Kiali view for Workspace-1
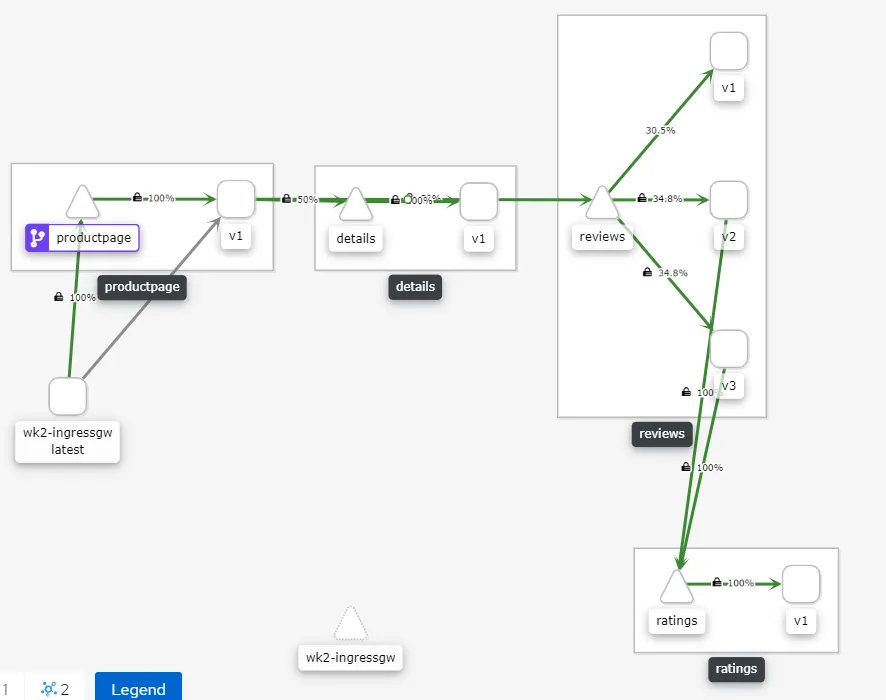
Kiali view for Workspace-2
Shortly, we will go over the 3rd scenario which is to run multiple Istio Control Planes (Multiple Service Meshes) within the same Kubernetes Cluster. For that, we will need to build an open-shift setup and deploy the Maistra Istio Operator. Special thanks to the Istio Community for helping me understand the concepts and also answering my queries and of course to Lee Calcote, who helped me embark on my Istio journey.
Sudeep Batra