Kubernetes provides robust RBAC (Role-Based Access Control) capabilities to manage access and authorization within a cluster. This allows you to control and restrict permissions for various resources. In this blog post, we will explore the process of binding a Kubernetes Service Account with a ClusterRole. We will also discuss how Meshery, a service mesh management tool, can be utilized to streamline the lifecycle management of Kubernetes clusters using MeshMap visual diagrams.
Prerequisites
Before we delve into the details, ensure that you have the following prerequisites in place:
- Access to a running Kubernetes cluster.
kubectl, the Kubernetes command-line tool, installed and configured to communicate with your cluster.- Meshery, the cloud native manager, installed and set up on your local machine.
Binding a Kubernetes Service Account with ClusterRole:
To bind a Service Account with a ClusterRole, follow the steps outlined below:
Step 1: Create a Service Account
First, we need to create a Service Account that we will later bind to a ClusterRole. Use the following kubectl command to create a Service Account named my-service-account:
1sh kubectl create serviceaccount my-service-account
Step 2: Create a ClusterRole
Next, let's create a ClusterRole that defines the desired permissions. You can either create a new ClusterRole or use an existing one. For the purpose of this example, we will create a ClusterRole named my-cluster-role that has read-only access to Pods and Services:
1apiVersion: rbac.authorization.k8s.io/v12kind: ClusterRole3metadata:4 name: my-cluster-role5rules:6- apiGroups: [""]7 resources: ["pods", "services"]8 verbs: ["get", "watch", "list"]
Save the above YAML definition to a file named clusterrole.yaml, and create the ClusterRole using the following command:
1bash kubectl apply -f clusterrole.yaml
Step 3: Bind the Service Account with ClusterRole
Finally, we need to bind the Service Account my-service-account with the ClusterRole my-cluster-role. This can be achieved by creating a ClusterRoleBinding. Execute the following command to create the binding:
1bash kubectl create clusterrolebinding my-cluster-role-binding --clusterrole=my-cluster-role --serviceaccount=default:my-service-account
The above command creates a ClusterRoleBinding named my-cluster-role-binding that associates the Service Account my-service-account with the ClusterRole my-cluster-role.
Verification:
To verify the successful binding, you can use the following command to check the ClusterRoleBinding:
1bash kubectl describe clusterrolebinding my-cluster-role-binding
You should see the Service Account and ClusterRole information listed under the Subjects and RoleRef sections, respectively.
Using Meshery and MeshMap for Kubernetes Cluster Lifecycle Management:
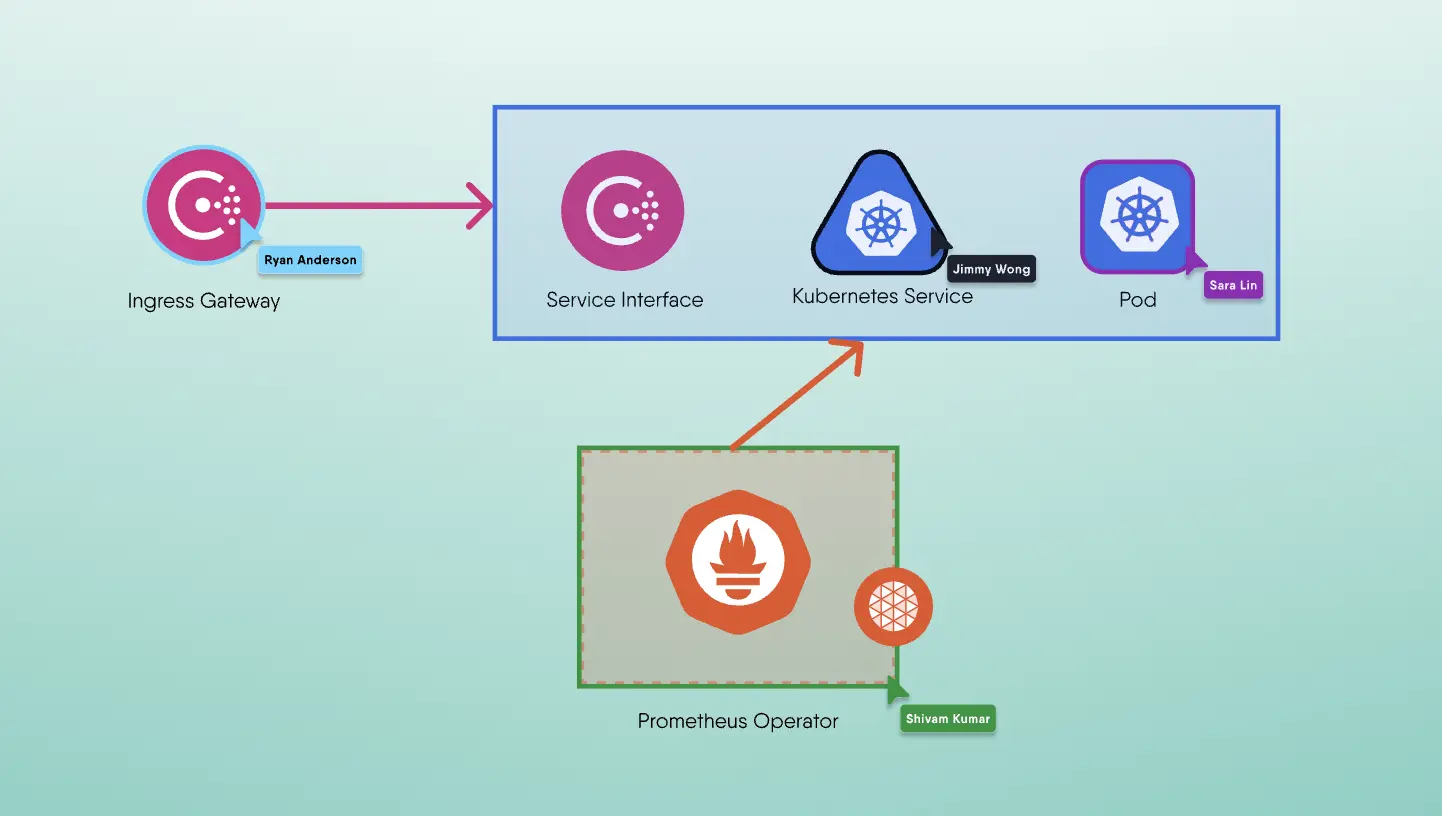
Meshery is a powerful service mesh management tool that simplifies the management and operation of service meshes, including Kubernetes clusters. MeshMap, a visual diagram feature of Meshery, provides a graphical representation of the service mesh components and their interactions.
To utilize Meshery and MeshMap for Kubernetes cluster lifecycle management, follow these steps:
Step 1: Install Meshery
Refer to the official Meshery documentation to install Meshery on your local machine or within your Kubernetes cluster.
Step 2: Connect to Your Kubernetes Cluster
Once Meshery is installed, connect it to your Kubernetes cluster by configuring the necessary authentication and connection details.
Step 3: Access MeshMap
After successfully connecting Meshery to your Kubernetes cluster, you can access MeshMap from the Meshery user interface. MeshMap visually represents the deployed service mesh, including service endpoints, traffic flows, and workload distribution.
Step 4: Visualize the Kubernetes Cluster with MeshMap
Once you have accessed Meshery and connected it to your Kubernetes cluster, follow these steps to visualize the cluster using MeshMap:
- From the Meshery user interface, navigate to the MeshMap section.
- Select your connected Kubernetes cluster from the dropdown menu.
- Click on the "Generate Map" button to generate a visual representation of the service mesh components and their interactions within the cluster.
- Explore the generated MeshMap to gain insights into your Kubernetes cluster's architecture, traffic patterns, and workload distribution.
Conclusion
In this blog post, we have learned how to bind a Kubernetes Service Account with a ClusterRole to control access and authorization within a cluster. We have also explored how Meshery and its MeshMap feature can be used for visualizing the service mesh components and their interactions within a Kubernetes cluster. By following these steps, you can effectively manage and monitor your Kubernetes cluster's lifecycle using RBAC and visualization tools.
 Team
Team